MFT Stamps Wednesday Sketch Challenge #426

Hello!  It's time for the latest Wednesday Sketch Challenge from MFT Stamps!  I went with something a bit out of my comfort zone today for my interpretation of the sketch.


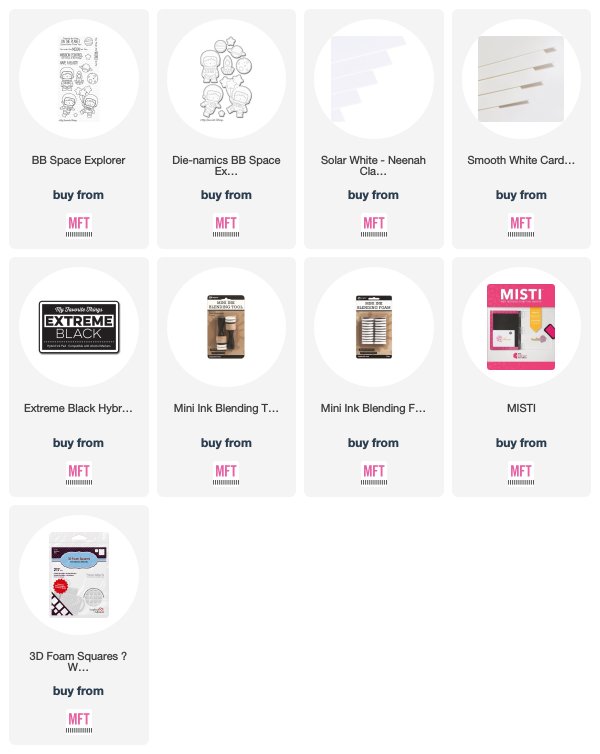
After looking at the sketch, (for quite awhile actually, lol), I knew that I wanted to have this cute Birdie Brown astronaut floating over the crest of the moon.  What I wasn't sure of was whether or not I could sketch a moon that actually looked like a moon.  I basically used a ruler to lightly draw a straight line at an angle and then used my Copic Sketch Markers (0, C00, C0, C1, C3, C4, C5) to do the rest.  Obviously, it's just an interpretation of the moon but hopefully it gets the point across!


For my background sky, I blended some Distress Inks (Stormy Sky, Faded Jeans, Chipped Sapphire, and Black Soot) onto a sheet of Neenah Solar White 110lb Card Stock.  I spritzed this panel lightly with water, blotted it with a paper towel and then splattered some Opaque White Paint over the top to resemble stars.  I used a white gel pen to add a few extra details.


I used one of the astronauts from the Birdie Brown Space Explorer Stamp Set for my image.  I stamped him with Copic friendly Black Ink, colored with Copics and then used the coordinating die to cut him out.  For my sentiment, I simply stamped it at an angle onto the surface of the moon with Black Ink.


Here's a look at this week's sketch!  I encourage you to come and play along!  It's a fun way to push your creativity and to also earn a chance to win a $50 MFT Gift Voucher when you enter!  Head on over to the MFT Challenge and Inspiration Blog to see what amazing designs the rest of the participating team members have come up with!


I hope you enjoyed my card today and thank you all so much for dropping by!

If you liked this card and want some more crafty inspiration, don't forget to check out my INSTAGRAM feed!

Wishing you all a wonderful day and happy card making!

♥ Rachel

MFT Stamps - February Hits & Highlights

Hello everyone!  For this months' Hit & Highlights Feature, we were challenged to use the Tic Tac Toe acrylic shapes without using the Tic Tac Toe Die-namics or X's and O's stamp set.  I had a lot of fun coming up with ideas for this challenge!


I decided to make some fun tags where I was also able to combine a bunch of cute stamp sets with the Tic Tac Toe shapes.  Tic Tac Toe designs don't have to be only for Valentine's Day.  You can show your love and/or appreciation for someone any day of the year.


Tags are such a fun way to add a little something more to a gift bag or wrapped present.  I love how fun these Tic Tac Toe pieces are!  They are so classic and simplistic yet very eye catching and so much fun to receive.


To start, I grabbed the Itsy Bitsy Polka Dot Pastels Paper Pack, took out 6 different colored sheets and diecut 6 tag bases using the Treat Tag Die-namics.  I then used the Square Window & Frame Die-namics to cut out color coordinating frames for each tag.  I used the same coordinating colored card stock (per tag) to also die-cut the top portion of each tag.


Instead of cutting a window in each tag, I simply glued the Tic Tac Toe Pieces where I wanted to place them and then glued the Square Shaker Pouch and Window Frame over top.  You don't have to do it this way (it's fun to leave the pieces loose so that you can shake them) but I found that I preferred my pieces to stay symmetric in this particular project.


I stamped my sentiments onto Smooth White Card Stock and then used one of the Essential Fishtail Sentiment Strips Die-namics to cut them out.  Once diecut, I then used a pair of scissors to trim off the fishtails and leave a perfect rectangle.

Stamp Sets Used:
(Product links can be found at the bottom of this post)
  • BB Birth Yay
  • Love Buds
  • Love Bugs
  • BB Gill Friends
  • Forever and Owlways
  • Birdie Brown Greetings Galore
All images were stamped with Copic friendly black ink, colored with Copic Sketch Markers and diecut with their coordinating dies.


I hope you enjoyed these tags today!  If you have never tried using the Tic Tac Toe acrylic pieces on your projects, I highly encourage you to give it a try!  Stop by the MFT Blog to see what the rest of the participating DT Members have come up with!

Thank you all so much for stopping by!  If you liked these tags and want some more crafty inspiration, don't forget to check out my INSTAGRAM feed!

Wishing you all a lovely day!

♥ Rachel


Arrgg! Pirates - Whimsy Stamps Ocean Box Card

Hello everyone!  I am so excited to share with you a fun box card that I made using the newly released Arrgg! Pirates Clear Stamp Set. (Affiliate links used)


I love how versatile this set is!  To start, I first stamped my images with Memento Tuxedo Black Ink.  I then colored them with Copic Sketch Markers. (I did some reverse stamping for the parrot so that he would be facing in the other direction.)


Reds: R02, R08, R46, R89, RV99
Browns: E30, E33, E23, E25, E27, E29
Blue Vest: B0000, B00, B04, B06
Greens: YG0000, G20, YG01, YG07, YG17, G28
Yellows: Y13, Y15, Y17, E35
Boots: E40, E41, E42, E43, E44, E47


To create the box portion of my card, I followed THIS tutorial but I usually tweak it and make a few changes in how tall the box is.  I used the Farmhouse Shiplap Background Rubber Cling Stamp to make my wooden panels to decorate the sides of my box.  I stamped it with Clear VersaMark Ink, heat embossed it with Clear Embossing Powder and then blended over top of it with both Tea Dye and Ground Espresso Distress Inks.


I used the Kinetic Straight Waves Die Set to make both my waves and sandy beach borders on the inside of my box card.  I LOVE these dies!  The stitching is just gorgeous.

I hope you enjoyed my card today!  Thanks so much for stopping by!
 

Arrgg! Pirates Clear Stamp SetKinetic Straight Waves Die SetFarmhouse Shiplap Background Rubber Cling Stamp


If you liked this card and want more crafty inspiration, don't forget to check out my INSTAGRAM feed!

Wishing you all a wonderful day!

♥ Rachel

Spring Greetings - Sunny Studio Stamps

Happy Friday!  I am so happy to share with you today a card featuring the adorable rabbits and tulips from the Spring Greetings Stamp Set from Sunny Studio Stamps!


I combined this set with a few of the matching tulips from the Easter Wishes Stamp Set and and created a tunnel card.  To start, I first stamped my images with Copic friendly black ink, colored them with Copic Sketch Markers and used the coordinating dies to cut them out.


Copic Colors Used:

Rabbits: 0, C00, C0, C2, C3
Ears: RV0000, R00, R01
Greens: YG0000, YG01, YG07, YG17, YG67
Teal: BG10, BG11, BG15, BG49
Pinks: RV0000, RV000, RV52, RV55
Purples: V000, V01, V06, V09
Dark Purplish Blue: B63, B66, B69


To get the tunneling effect, I trimmed 4 pieces of white card stock to 4.25" x 5.5".  I then used 3 different circle dies to cut into the first 3 pieces going from the largest circle to the smallest.  For the front panel, I added a sheet of beautiful blue patterned paper from the Spring Sunburst Paper Pad.  I added some 3D Foam Tape behind each panel so that it was lifted off of the panel behind it, therefore giving it more depth.


I cut some grass from two different shades of green patterned paper from the Classic Gingham 6x6 Paper Pad using the grass die from the Sunny Sentiments Die Set.  I blended some Tumbled Glass Distress Oxide Ink for the sky and added a couple of clouds cut from white card stock using the Comic Strip Every Day Dies.  Lastly, I stamped my sentiment onto a strip of white card stock with black ink and adhered it to the front of my card.

Thank you for taking the time to drop by!  I hope you enjoyed my card today!  For more crafty inspiration, don't forget to check out my INSTAGRAM feed!

Wishing you all a wonderful day!

♥ Rachel

MFT February Birthday Project Challenge - You're How Old?

Hello friends!  This month's Birthday Project Challenge from My Favorite Things has to do with using a numerical representation on your card.  The challenge is to come up with interesting ways to feature numbers in your designs.


I went for a subtle design by using a single digit on top of a cake.  I used the LLD Bottlecap Numbers Die-namics.  The numbers fit perfectly on top of the cake!


For the background of my card, I blended some Spun Sugar, Shaded Lilac, and Wilted Violet Distress Oxide Inks.  I then splattered this panel lightly with some opaque white paint.


For my images, I stamped them lightly with Cement Gray Ink and tried some no-line coloring with Copic Sketch Markers.  I used the coordinating dies to cut them out and adhered them to my card with 3D Foam Adhesive.


Don't forget to stop by the MFT Challenge Blog to see what the rest of the participating team members have created!  Come play along for a chance to win a $50 MFT Gift Voucher!

Thanks for dropping by!  If you liked this card and want some more crafty inspiration, don't forget to check out my INSTAGRAM feed!

Wishing you all a wonderful day!

♥ Rachel

MFT Wednesday Sketch Challenge #425

Hello everyone!  I have a brand new sketch challenge from My Favorite Things to share with you today!


I used the Castle Die-namics combined with both the Knight in Shining Armor and Once Upon a Time Stamp Sets to follow this week's sketch layout.  To make the castle, I first blended Hickory Smoke Distress Ink Oxide onto a sheet of smooth white paper.  Once dry, I then blended over top of this panel with the English Brick Wall Stencil and Black Soot Distress Oxide Ink.


I stamped my images with Black Ink and then colored them with Copic Sketch Markers.  I used the coordinating dies to cut them out.


I used the Mini Cloud Edges Stencil and Salty Ocean Distress Oxide Ink to create my sky and colored the grass with Copics.


Here's a look at this week's sketch!

Come play along with us and have some fun!  One random winner will win a $50 MFT Gift Voucher!  Head on over to the MFT Challenge & Inspiration Blog for more details.


Thank you so much for stopping by!  If you liked this card and want some more crafty inspiration, don't forget to check out my INSTAGRAM feed!

Wishing you all a a lovely day!

♥ Rachel


The Stamps of Life Card Kit Club

Hello, crafty friends!  I hope your week is off to a good start!  I have a gorgeous Card Kit to share with you today from The Stamps of Life.  This month's kit is called the Blessed Collection.


 I absolutely love the Card Kits from The Stamps of Life.  They are reasonably priced for the amount of goodies that you receive and ship for free.  The theme always coordinates with that month's Stamp and Die Set of the month (which are separate from the Card Kit) and comes with their own exclusive stamp and die set.


The other thing that is very appealing is that when you sign up for the Card Kit Club, you automatically receive 15% off on all future Stamps of Life purchases while you are a club member.  If you are also a member of the Die Hard Club, (where you automatically receive the stamp and die set of the month), you get 20% off on all Stamps of Life purchases.  Another huge bonus is that you get the 20% off of sale prices too!  I have been a Club Member for almost 4 years now and I absolutely love all of the perks that come with it!


 I made some quick and easy cards with this month's Card Kit.  I tried to used only products that came with the Card Kit to show you how easy they are to use.  I did use a few standard-shaped dies that many of you may already have (from various companies) which I will list below.  All products that I used in my cards, though, were from The Stamps of Life.


I love the embellishments that come with this month's kit!  those wooden flower pieces are just gorgeous and look so beautiful on each card.


Each kit comes with a beautiful color palette that compliments each other.  As you can see, this card varies greatly in color from the others that I made, but compliments them very well.


The wreaths that I used on two of the cards actually came with this Card Kit  as well.  They match perfectly with the Stamp and Die Set of the month.


I simply cut these wreaths from the Blessed Patterned Paper Pad that comes with the kit.  It has 24 gorgeous double-sided pieces of heavy-duty patterned paper.


Since I'm a Club Member, I had the die to cut them out, but you can easily fussy cut them if you wanted to!


Here's a fun quick little video to show you what this month's kit includes!

Head HERE for more details on joining The Stamps of Life Card Kit Club!  If you love card making and are looking for a way to make quick, easy, and elegant cards, I truly believe that you will love this club!

Thanks so much for dropping by!  If you liked these cards and want some more crafty inspiration, don't forget to check out my INSTAGRAM feed!

Wishing you all a lovely day!

♥ Rachel


List of Products Used:


Whimsy Stamps Adopt Don't Shop DOGS Stamp Set

Hello and happy weekend!  I recently mentioned about a fun facebook event being hosted by Whimsy Stamps (see post here) to help provide support for animals that need adoption.  Today, I have a card to share with you using one of their "Adopt Don't Shop" Stamp Sets.  There are two versions.  One for cats and one for dogs. (Affliate links used.)


My card today features the Adopt Don't Shop DOGS Set and I just love this sweet image!

Adopt Don't Shop DOGS Stamp Set

To create my project, I used my MISTI to stamp this image onto a piece of Neenah Solar White 110lb Card Stock with Copic friendly black ink.


I then colored my image and background using Copic Sketch Markers.  This is a single-layer card but I love how this stamp set makes it look like I put in a lot of effort and masked some of the images (even though I didn't, lol).


Copic Colors Used:

Dog on left: E30, E31, E23, E27, E29
White Dog: 0, C00, C1, C2, C4, C5
Black Dog: C2, C4, C5, C7, C8
Medium Brown Dog: E40, E41, E42, E43, E44, E47
Reddish Brown Dog: E97, E08, E19, E18
Grass: G20, G21, G24
Sky: B0000, B000


I then added a lovely stitched white frame around my image using the Shaker Maker Rectangle Die Set.  I love all of the Shaker Maker Dies from Whimsy Stamps.  The stitching and wide frame bring a lot of elegance to your cards as well as make it super easy to create shaker cards.


Shaker Maker Rectangle Die Set


For every Adopt Don't Shop Stamp Set that is purchased, Whimsy Stamps will donate $1 (per set) to the Gulf Coast Humane Society!


Here's a look at the adorable Adopt Don't Shop CATS Set as well.


There's still one day left to participate on the fun Facebook party and have a chance to play some fun games and win some prizes!  Click HERE for more details. 

Whimsy Stamps

Thanks so much for stopping by!  You can check out all of the other wonderful products that Whimsy Stamps has to offer HERE.

If you liked this card and want some more crafty inspiration, don't forget to check out my INSTAGRAM feed!

Wishing you all a wonderful day and happy card making!

♥ Rachel

Staggered Circle Die - Sunny Studio Stamps

Hello everyone!  Today I am sharing a project that features the new Staggered Circle Die from Sunny Studio Stamps.


I decided to go with an underwater-themed card and used the cutout circles as shaker windows.  To start, I first trimmed a piece of white card stock to 4.25" x 5.5" and then cut out the stitched windows with the Staggered Circle Die.  I then blended a separate piece of smooth white card stock with some Distress Inks (Cracked Pistachio, Peacock Feathers, and Chipped Sapphire) to go behind my top panel.


I used images from both the Oceans of Joy and Magical Mermaids stamp sets and colored them with Copic Sketch Markers and used the Oceans of Joy and Magical Mermaids Die Sets to cut them out.  I adhered them to the ink blended panel after lining up the windows and deciding where I wanted to place them.


I then glued a piece of acetate over each of the windows (except for the top left one) and added some clear 3mm sequins and white seed beads for my embellishments.  I used some 3D Foam Adhesive Tape to give my shaker elements room to move.


I cut a piece of Velum Paper with one of the Wavy Border Dies and glued it within my top circle to make my dolphin look like he's popping out of the water.  Lastly, I heat embossed my sentiment with Fine Detail White Embossing Powder onto black card stock and added it to the front of my card.

Thanks for stopping by today!  I hope you all have a lovely weekend!

 If you liked this card and want some more crafty inspiration, don't forget to check out my INSTAGRAM feed!

Wishing you all a wonderful day and happy card making!

♥ Rachel