MFT Color Challenge #111

It's time for a new Color Challenge from My Favorite Things!  This week's color combo is a gorgeous combination of reds, gray, and white.  You don't have to use the exact colors listed to play along but simply use ones inspired by the colors shown on the challenge palette.


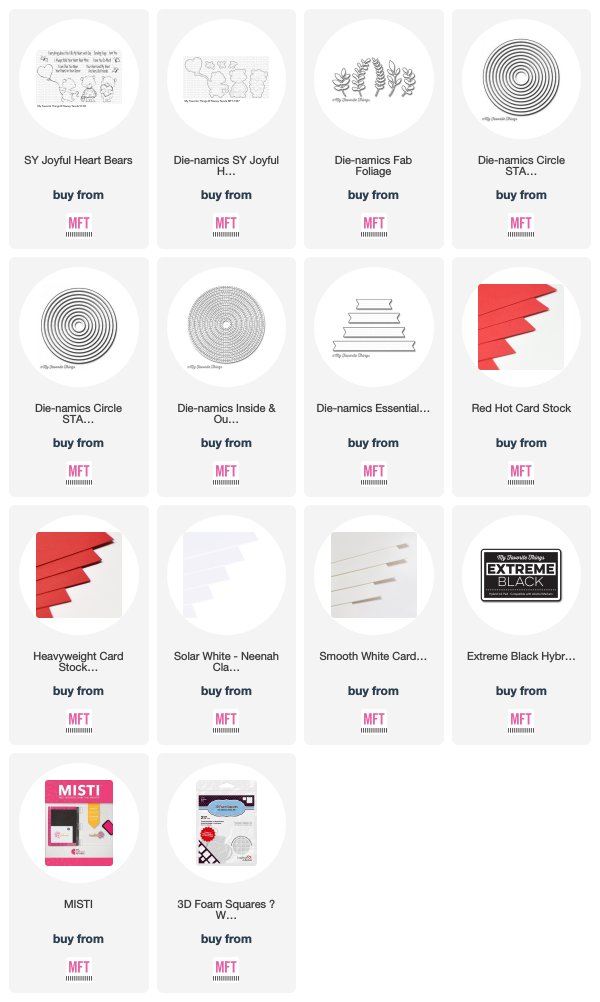
I put together a fun little shadow box featuring the SY Joyful Heart Bears Stamp Set.  I first created the base of my box by trimming two pieces of Smooth White Card Stock to 7" x 4.25".  I scored these pieces along the long side at 1.5" and 5.5" so that the final dimensions of my shadow box is 4" wide, 1.5" deep and 4.25" tall.


I diecut a circle into the front of one panel using the Circle STAX Die-namics Set 1.  To get a frame around the outside, I used both the Circle STAX Die-namics Set 2 along with the Inside & Out Stitched Circle Die-namics with a piece of Red Hot Card Stock.  To get the dimension on the inside of my shadow box, I trimmed two more pieces of White Card Stock to 4.75" x 4.25" and scored along the long side at 3/8" and 4 3/8".  I then diecut circles (using a smaller circle than the panel in front of it) for each panel.


I stamped all of my images with Copic friendly Black Ink and used Copic Sketch Markers to color them.  I used the coordinating dies to cut them out.  I added some foliage in both Red Hot and Electric Red Card Stock using the Fab Foliage Die-namics.


I used clear acetate to add the butterflies.  Lastly, I heat embossed the my sentiment on a piece of Electric Red Card Stock with Fine Detail White Embossing Powder.  I used the Essential Fishtail Sentiment Strips Die-namics to cut out my sentiment and then trimmed off the fishtails with a pair of scissors.


Come join in on the fun for a chance to win a $50 MFT Gift Voucher!  Head on over to the MFT Challenge & Inspiration Blog to see what the rest of the participating DT Members have created.

I hope you enjoyed my card today!  Thanks so much for stopping by!  If you liked this card and want some more crafty inspiration, don't forget to check out my INSTAGRAM feed!

Wishing you all a wonderful day and happy card making!

♥ Rachel
MFT Stamps Wednesday Sketch Challenge #424

Hello friends!  I have a super fun Sketch Challenge to share with you today from My Favorite Things!


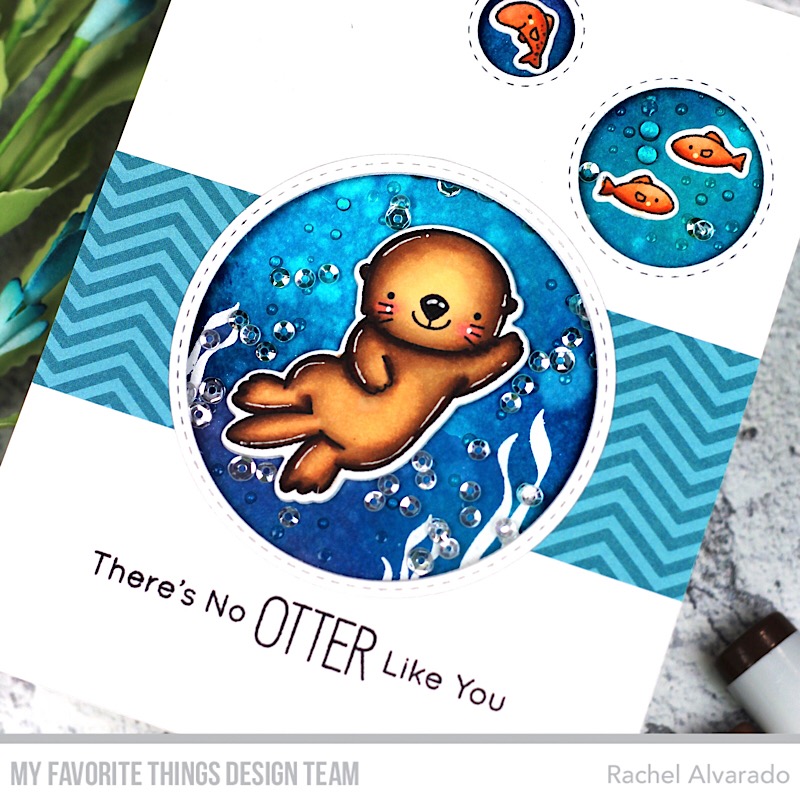
I followed the sketch layout as closely as possible when creating this fun, watery shaker card.  For the inked background, I blended some Broken China, Peacock Feathers, Mermaid Lagoon, and Seedless Preserves Distress Inks.  I spritzed this panel lightly with water and blotted it dry with a paper towel.


I stamped all of my images with Copic Friendly Black Ink, colored with Copics and used the coordinating dies to cut them out.

Colors Used:
Browns: E30, E31, E23, E25, E29, E47
Oranges: YR00, YR04, YR07, E34


 For my stitched circle around the center circle, I simply used the Inside & Out Stitched Circle Die-namics to cut out a stitched circle, and one of the Circle Die-namics to make it into a frame with a skinny, single stitch.  Prior to adding my frame, I added a strip of patterned paper from the Fresh Squeezed Chevron Paper Pad.


I added some 3D Foam Adhesive Tape to the back of my front panel so that the card could hold my sequin embellishments.  Lastly, I stamped the sentiment with Black Ink across the front.


Here's a view of Sketch #424.  Come play along for a chance to win a $50 MFT Gift Voucher!  Head on over to the MFT Challenge & Inspiration Blog for the link-up and for more sketch inspiration.


Thank you for stopping by; I hope you enjoyed my card today!  If you liked this card and want some more crafty inspiration, don't forget to check out my INSTAGRAM feed!

Wishing you a lovely day!

♥ Rachel

Whimsy Stamps Adopt Cats & Dogs Campaign

Hello everyone!  I wanted to quickly drop in and tell you about a great campaign that Whimsy Stamps is running.  Recently, Whimsy Stamps debuted two new stamp sets called Adopt Don't Shop Dogs and Adopt Don't Shop Cats.  For every purchase of either one of these stamp sets, Whimsy Stamps will donate (per set) $1 USD to the Gulf Coast Humane Society.

Whimsy Stamps Adopt Don't Shop Party!

Also, join the online Facebook Adopt Don't Shop Party (Feb 14th - 17th) for some fun, games, giveaways, and a chance to win some crafty prizes!  Receive a FREE digi stamp when the count reaches 250!  So, invite your animal lover friends to come play along!

 Adopt Don't Shop Dogs


Adopt Don't Shop Cats


More details can be found HERE.

Thank you so much for dropping by!

Wishing you all a lovely day!

♥ Rachel

Party Pengins - MFT Tips & Tricks

Hello everyone!  I am here today to share a few tips and/or tricks with you using the newly released Party Penguins Stamps Set from MFT Stamps.


I have been creating a lot more slimline cards lately but they really are so much fun to do!  I love how it gives you a lot more room to create a scene without looking too bulky.


I have a few tricks to share with you today.  The first is a quick and easy method to bring character and more dimension to your penguins.


Here is an image of what the penguins first looks like when you stamp them with black ink.


To give the penguin a little more dimension, I took some Cool Grey Copic Sketch Markers (0, C00, C0, C1, C2, C3, C4) and blended them in a circular motion over the penguin's belly, going from darkest to lightest from the outside in.


Secondly, if you want to add some cartoon-like eyes, it's simple on this type of image which resembles an image that is done with no-line coloring.  Following a fun technique that I learned from the ultra-talented Jane Allen, I first blended some circles around the stamped black eyes with the blue B01 Copic Sketch Marker once the belly of the penguins were dry.   


Once this was dry, I then blended dark circles for the pupils using W8.


Lastly, I added some highlights with a White Gel Pen.


I learned this trick the hard way after my first set of penguins with this stamp set were way off.  If you want feet that are perfectly lined up with the stamped feet, simply diecut your images FIRST and then stamp the feet into the white space for a perfect fit.


Now these penguins are ready to be added to my card base.


My card base was cut to 8.5" x 3.5" with the top layer cut to 8.25" x 3.25".  I blended the background with some Distress Oxide Inks (Blueprint Sketch and Shaded Lilac) and then splattered this background with some Opaque White and Purple paints.


I actually used the triangular stamp, meant for the party hat, as my banners today.  I stamped a number of triangles with Tickled Pink and Razzle Berry Prestige Inks and then quickly fussy cut these triangles with my scissors.


Lastly, I attached all of my images with 3D Foam Adhesive Squares and heat embossed my sentiment onto a sheet of Purple Rain Card Stock with Fine Detail White Embossing Powder.


Stop by the MFT Blog for some more Tips & Tricks


I hope you enjoyed my card today!  Thanks so much for stopping by!  If you liked this card and want some more crafty inspiration, don't forget to check out my INSTAGRAM feed!

Wishing you all a lovely day!

♥ Rachel

Wreath2stamp and Elephant Pudgie - The Stamps of Life

Hello, crafty friends!  I have another card to share with you today that showcases the new and lovely Wreath2stamp set from The Stamps of Life.  This time, I combined it with the adorable Elephant Pudgie Set.


As I mentioned in my previous guest post, the new Wreath2stamp set is so versatile.  It can be dressed up or down, stand alone, or be combined with so many other stamp sets.  Today, I have the cute Elephant Pudgie popping up to say hello from the center of the wreath.


To start, I first created my background panel.  To do this, I blended a couple of Distress Oxide Inks (Spun Sugar and Shaded Lilac) onto a 5.5" x 4.25" sheet of Neenah Solar White 110lb Card Stock.  Once dry, I then splattered this panel with some Opaque White Paint for added interest.


I then diecut a stitched rectangular panel from some Powdered Sugar Card Stock using the Exclusive Stitched Rectangle Die Set.  I love the distinctive and gorgeous stitching on this set!  Once complete, I added a circle in the center of this panel by diecutting it once more with one of the Circle Dies and then stamped my sentiment with Grape Ink.  I then added my elephant, whom I had colored with Copic Sketch Markers (C00, C0, C1, C2, C3, C4, C5), in the center of this circle.  Once done, I then adhered this panel to my card base with some Double Sided Adhesive Foam.


Lastly, I added my wreaths.  For the first one (the green wreath) that sits subtly below my purple one, I stamped it with Mint Chip Ink and then cut it with the coordinating die.  I then stamped my top wreath with Grape Ink and added it with some 3D Foam Adhesive.  I added some flowers and leaves (diecut from Mint Chip Card Stock) to my wreath to finish off my card.

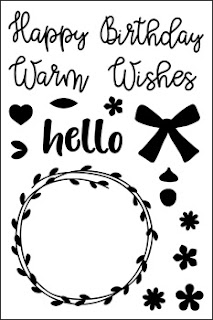
Wreath2stamp

You can look HERE for more details and inspiration using this beautiful set.


Thank you for stopping by!  I hope you enjoyed my card tdoay!  If you liked this card and want some more crafty inspiration, don't forget to check out my INSTAGRAM feed!

Wishing you all a lovely day!

♥ Rachel

Chubby Bunny - Sunny Studio Stamps

Hello, crafty friends!  I'm so excited to share with you a fun box card featuring the adorable Chubby Bunny Stamp Set.  I absolutely love these sweet little bunnies and had a lot of fun working with them.


To start, I first created the box portion of my card with a sheet of white card stock, scoring board, scissors, glue, and a paper trimmer.  I stamped all of my images with Copic friendly black ink, colored them with Copics and used their coordinating dies to cut them out.


Copic Colors Used:
  • Bunnies: 0, C00, C0, C2, C3, C4
  • Baskets & Chocolate Bunny: E31, E23, E25, E29, E49
  • Yellow: Y000, Y11, Y06
  • Pastel Green: G0000, G000, G00, G02
  • Blues: B0000, B00, B01, B04, B05
  • Pinks: RV0000, RV00, RV52, RV55
  • Purples: V000, V01, V04, V06, V09
  • Ears: RV00, R81, R85
  • Cheeks: R81


I then added some purple patterned paper from the Flirty Flowers Paper Pad to decorate the side panels of my card.  This paper pad is just gorgeous!  I love the subtle details of the flowers.


Lastly, I adhered all of images to either the inside shelves (with liquid adhesive) of the box or to the front of it (with 3D Foam Adhesive Squares).  I love the "Happy Easter" banner that comes with this set.  When I first saw it, I immediately knew that I wanted to make a box card using it as a 3D banner.


Thank you for stopping by; I hope you enjoyed my card today!  I will be back next week with another project using some more amazing Sunny Studio products!  If you liked this card and want some more crafty inspiration, don't forget to check out my INSTAGRAM feed!

Wishing you a lovely day!

♥ Rachel

Wreath2stamp - The Stamps of Life

Hello everyone!  I am so happy to be guest designing for The Stamps of Life this month.  For those of you that don't know, it was because of The Stamps of Life that I first got into card making a few years ago.  I had stumbled across their gorgeous Candles4birthday Stamp Set while looking for ideas for my sister-in-law's first baby shower.  I had never even seen a set of clear stamps prior to that and from that moment on, I was hooked!


 I have a fun card to share with you today featuring the new and gorgeous wreath2stamp set.  I absolutely love this wreath!  

wreath2stamp

This set is just so beautiful and versatile.  To start, I first stamped this wreath twice in two separate colors.  Once with Color Box Blue Jay Ink and the second wreath with Color Box Seaglass Ink.  I then used the coordinating die set to cut them out.


I then used a sheet of Gingersnap Card Stock and trimmed it to 5.5" x 3.75".  I used a Circle Die to cut a hole in the top center of the card and then added a piece of fencing into the center of the circle from the Sizzix Flowers & Fence Stamps & Dies.  I adhered this entire panel to a sheet of patterned paper from the Big Hugs Patterned Paper Pad.


I then colored some birds from the Birdcage2stamp Set with Copic Markers (BG0000, BG000, BG11, BG45, BG18).  I used the coordinating dies to cut them out.  For my sentiment, I cut a strip of Powdered Sugar Card Stock and stamped my sentiment with Seaglass Ink.


I added my wreaths in separate layers.  I glued the lighter one to the outer edge of the circle window on my card panel.  I then added a few leaves that I cut using the Wreath2stamp Die Set from both Blue Jay and Seaglass Card Stock and added my top wreath with some 3D Foam Adhesive to give it more dimension.  


I then diecut some white flowers using the same wreath die set and used some more foam adhesive squares to add them to my top wreath.  To finish my card, I then added a drop of Sea Breeze Nuvo Jewel Drops to the center of each flower.


The Stamps of Life

I hope you enjoyed my card today!  You can check out the rest of the beautiful stamps and dies offered from The Stamps of Life HERE.

Thank you for stopping by!  If you liked this card and want some more crafty inspiration, don't forget to check out my INSTAGRAM feed!

Wishing you a lovely day and Happy Cardmaking!

♥ Rachel